This project replaces the controller board in a Philips XXL Airfryer.
An airfryer contains the following elements:
- Temperature sensor
- Fan
- Heating element
- PSU
- Controller board (UI)
The first three components and the relays on the power supply (PSU) board were reused in this project. Keep in mind that the relays on the PSU needs 12V. Another option is to buy 5V relays.
Features:
- Persistent cookbook (using EEPROM memory)
- Multiple steps when cooking (different temperatures, timings).
- Delay cooking (act as a timer when temperature is zero)
- Preheat option.
Code: https://github.com/VinzzB/Arduino-Airfryer
Simulation @ wokwi: https://wokwi.com/projects/335149333902000724
Unfortunately the wokwi simulation can not simulate fast rotary rotations.
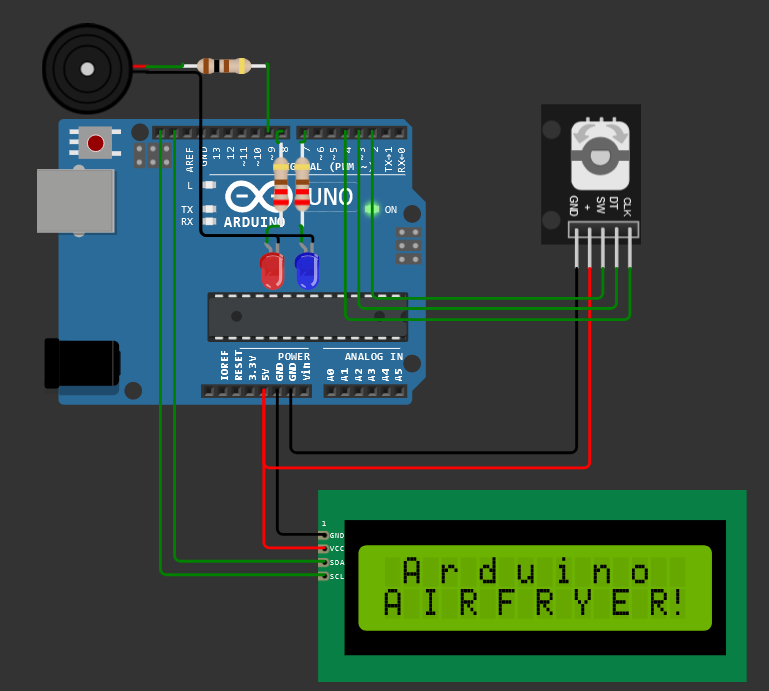
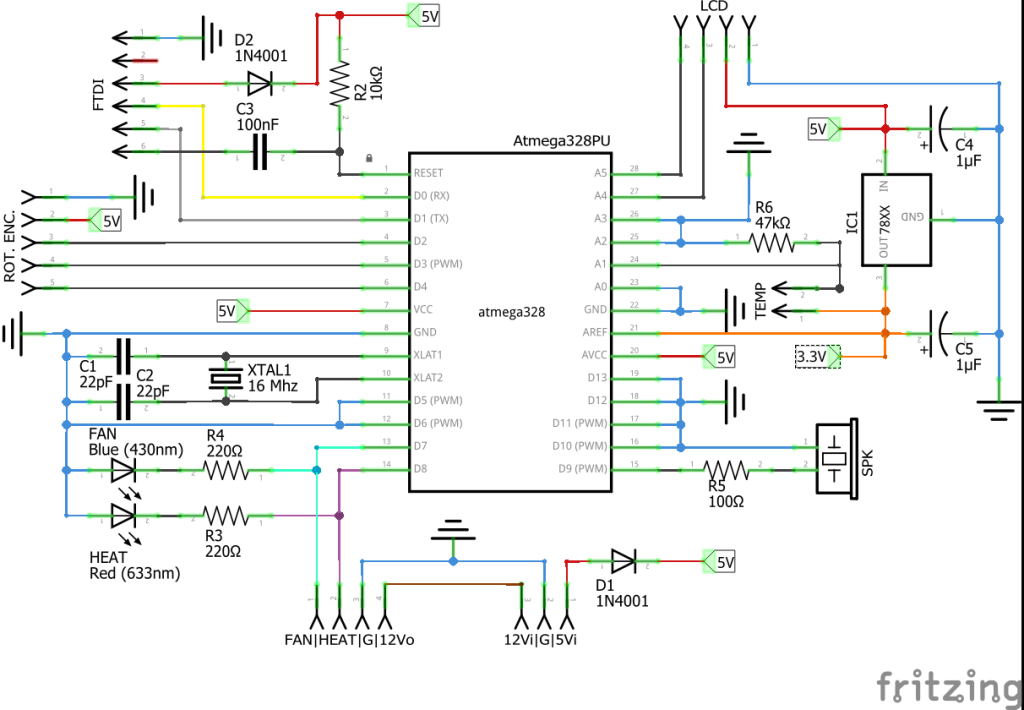
Schematic
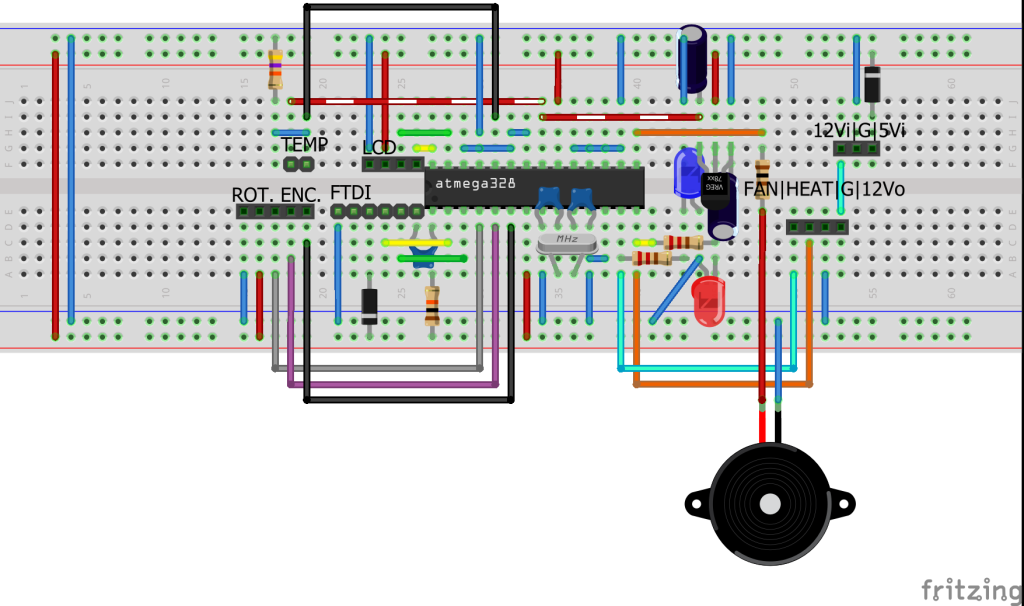
Breadboard
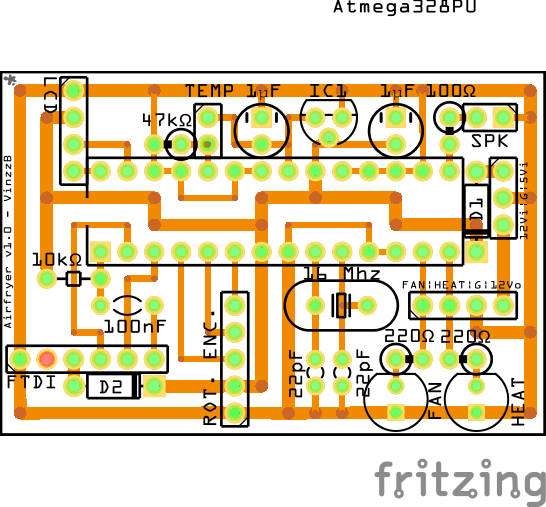
PCB
How it works
When the device starts for the first time the EEPROM structure is being prepared. Then you’ll enter the main menu where you can choose between different products. A single button press will load the cooksteps for the selected product. Push and hold the button to edit the product name.
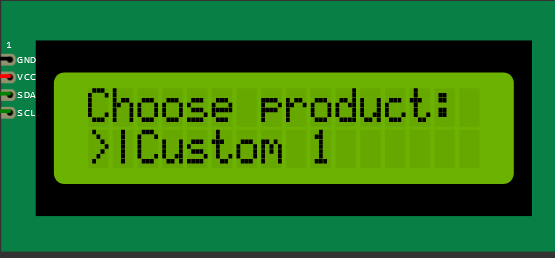
Single click: load selected product.
Double click: Load product and start engine.
Long press: Edit product name
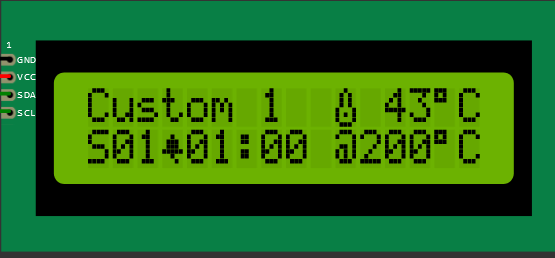
The options for a product are shown on the LCD when you selected a product.
Rotary: change remaining time for current step.
Single click: start the engine
Double click: Go to menu.
Long press: Start edit mode
This screen shows:
- First row (from left to right):
- The name of the product.
- Preheat enabled / disabled.
- The device temperature
- Second row (from left to right):
- The step that is currently shown.
- Buzzer option when current step finished
- Remaining time for current step.
- Temperature for current step.
A product has one or more steps. You can set the time, temperature and buzzer for each step. If the temperature in the first step is set to zero cooking will be delayed for set time. You can change these presets while the engine is not running.
Start the engine with a single button press. The first line on the LCD will now show the elapsed time.
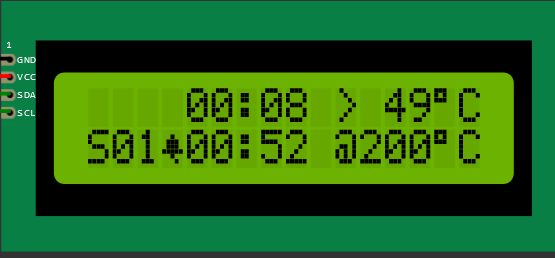
You can still edit steps while the engine is running, but the changes will not be preserved. in the associated product. These changes will only apply for the current run.
To save changes made to a product, go back to the menu and scroll to another item. A ‘save changes?’ dialog will appear. Select Yes, no or abort.
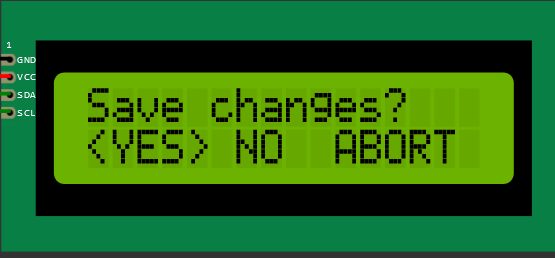
Yes = Save to EEPROM
No = Load previous settings.
Abort = Go back (use / edit current product)
More info will follow soon…
Disclaimer: In no event shall the author of this Software be liable for any special, consequential, incidental or indirect damages whatsoever (including, without limitation, damages for loss of business profits, business interruption, loss of business information, or any other pecuniary loss) arising out of the use of or inability to use this product, even if the Author of this Software is aware of the possibility of such damages and known defects.